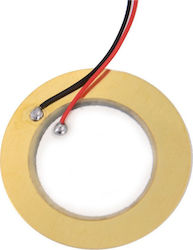
The first thing I wanted to try out after I have received my Piezo Buzzer was to generate some simple beeps. In Standard Arduino there exists the tone() function which – unfortunately – is not available in the ESP32 Arduino implementation.
There are libraries to bridge this gap, but I was wondering how this could be implemented using the functionality which is available. I came up with the following alternatives:
- Use I2S together with the built in DAC: This is not simple and in the best case we can generate sounds on max 2 pins.
- Use the built in PWM functionality: The functionality is available to set the frequency and the number of pins are limited by the available timer (2 channels groups * 8 channels each) which gives 16 parallel sounds which is not bad.
- Use digital output together with a timer: There are 2 groups where each has 2 general purpose timers.
Here is an first simple example which uses the last approach. We use a timer which toggels the indicated digital pin on and off in the indicated frequency. This is done in a timer interrupt using an alarm.
const int PIN = 25;

hw_timer_t* timer = NULL;
bool value = true;
int frequency = 20; // 20 to 20000

void IRAM_ATTR onTimer() {
  value = !value;
  digitalWrite(PIN, value);
}

void setup() {
    Serial.begin(115200);
    pinMode(PIN, OUTPUT);    // sets the digital pin as output
    setupTimer();
}

void setupTimer() {
    // Use 1st timer of 4  - 1 tick take 1/(80MHZ/80) = 1us so we set divider 80 and count up
    timer = timerBegin(0, 80, true);//div 80
    timerAttachInterrupt(timer, &onTimer, true);
}

void setFrequency(long frequencyHz){
    timerAlarmDisable(timer);
    timerAlarmWrite(timer, 1000000l / frequencyHz, true);
    timerAlarmEnable(timer);
}

void tone(long frequencyHz, long durationMs){
    setFrequency(frequencyHz);
    delay(durationMs);
}

void loop() {
    Serial.print(frequency); // in hz
    Serial.println(" hz");
    tone(frequency,1000);
    frequency+=100;
    if (frequency>=200000){
      frequency = 20;
    }
}
I decided to use this approach and change it so, that we can drive any number of pins with one single timer.


5 Comments
Martin McMerkin · 14. December 2021 at 14:54
This is great, I am trying to use it to generate a confirmation tone when a button is pressed, it seemed to work really well.
Obviously I edited it to get the right frequencies and it makes a great sound.
However; and there is always a however. Once I have told it to make the sound, how do I stop it?
Well that was the question but now I know.
It’s “timerStop(timer);”
OK, it may not teardown everything but I want the buzzer to be usable at several points in the program and that is what I now have.
Thanks, just goes to show that the help people share, thanks again by the way, sometimes it causes people like me to find out new stuff.
Only took overnight, and a lot of playing.
Many thanks. Seriously Thanks.
longqi · 2. November 2021 at 9:00
It works. Thanks for sharing.
Tony · 23. June 2021 at 7:44
Thanks so much, I was looking for something just like this for a project I’m working on 😀
Ken Morgan · 26. May 2021 at 3:06
Thank you very much!
Implementing Arduino tone() for the Rasperry Pico - Phil Schatzmann · 31. January 2021 at 22:45
[…] I love the fact that we can pass an argument to the timer function. This is much more elegant then the version that I implemented for the ESP32. […]