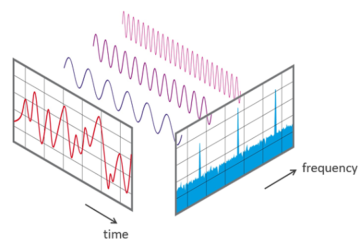
We can try to use a “Bar Chart” to display the result of FFT or the volume, so it is time to have a look at the built in LED Matrix. The basic API to update an LED is as follows:
The LED API – Introduction
#include "Arduino_LED_Matrix.h"
ArduinoLEDMatrix matrix;
uint8_t frame[8][12] = {0};

void setup(){
  matrix.begin();
  frame[7][0] = true; // acivate LED at 0,7 (left lower corner)
  matrix.renderBitmap(frame, 8, 12);
}

void loop(){}
I have added some functionality on top of this, so the same thing can be done with
#include "AudioTools.h"
#include "AudioLibs/LEDOutputUnoR4.h"
LEDOutputUnoR4 leds;

void setup(){
  leds.begin();
  leds.ledXY(0,0) = true;
  leds.display();
}

void loop(){}
As you can see, I transformed the 0 coordinates to the left lower corner, when we use the default configuration.
A barchart can be drawn with the following commands:
#include "AudioTools.h"
#include "AudioLibs/LEDOutputUnoR4.h"
LEDOutputUnoR4 leds;

void setup(){
  leds.begin();
  for (int x=0;x<12;x++){
    leds.addColumnBar(random(7)+1);  // random number between 1 an 8
    // leds.setColumnBar(x,random(7)+1); // gives the same result
  }
  leds.display();
}

void loop(){}
And a scrolling barchart is quite easy to implement:
#include "AudioTools.h"
#include "AudioLibs/LEDOutputUnoR4.h"
LEDOutputUnoR4 leds;

void setup(){
  leds.begin();
}

void loop(){
  leds.addColumnBar(random(7)+1);  // random number between 1 an 8
  leds.display();
  delay(1000);
}
Displaying the Volume on the LED Matrix
In one of my prior posts, I have demonstrated how to use a Analog Microphone with the UNO R4. We can now easily extend the sketch to display the volume on the LED Matrix.
#include "AudioTools.h"
#include "AudioLibs/LEDOutputUnoR4.h"

AudioInfo info(8000, 1, 16);
AnalogAudioStream in; // mic input
VolumeOutput out; // determin volume
StreamCopy copier(out, in);
LEDOutputUnoR4 leds;
int count=0;

// Arduino Setup
void setup(void) {
  Serial.begin(115200);
  AudioLogger::instance().begin(Serial, AudioLogger::Info);
  // start LEDs
  leds.begin();
  // start ADC
  auto cfgRx = in.defaultConfig(RX_MODE);
  cfgRx.copyFrom(info);
  in.begin(cfgRx);

  // open output
  out.begin(info);
}

// Arduino loop - copy data
void loop() {
  copier.copy();
  if (count++>20){
    count=0;
    int vol_bars = map(out.volume(), 0, 1000, 0, 7);
    leds.addColumnBar(vol_bars);  // random number between 1 an 8
    leds.display();
  }
}
If we update the volume at every loop, it will run much too fast, so we slow the scrolling down with the help of the count variable: the bigger this variable, the slower the scrolling.
We can see in my last post that the measured values are most below 1000, so we map the range from 0 to 1000 to 0 to 7 which is the max led height (=y pos);
The Final Sketch
This scenario is already built into the LEDOutputUnoR4 class. Here is the final version:
#include "AudioTools.h"
#include "AudioLibs/LEDOutputUnoR4.h"

AnalogAudioStream in;
AudioInfo info(8000, 1, 16);
VolumeOutput out;
StreamCopy copier(out, in); // copy i2sStream to CsvOutput
LEDOutputUnoR4 leds(out); // use VolumeOut scenario

// Arduino Setup
void setup(void) {
  Serial.begin(115200);
  AudioLogger::instance().begin(Serial, AudioLogger::Info);
  // configure and start LEDs
  auto ledc = leds.defaultConfig();
  ledc.update_frequency = 20;
  ledc.max_magnitude = 1000;
  leds.begin(ledc);
  // start ADC
  auto cfgRx = in.defaultConfig(RX_MODE);
  cfgRx.copyFrom(info);
  in.begin(cfgRx);

  // open output
  out.begin(info);
}

// Arduino loop - copy data
void loop() {
  copier.copy();
  leds.update();
}
Here you can also find some of my other posts related to the Arduino Uno R4

0 Comments