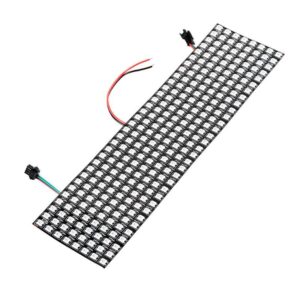
I have added a simple output class to my Arduino Audio Tools which can display the result of a FFT analysis on an LED Matrix. For my tests, I am using a 32 x 8 LED Matrix, but first we need to test the functionality.
Determine the Wiring Logic
I am using the FastLED library to update the LEDs. To simplify the processing I am providing the LEDOutput class.
#include "AudioTools.h"
#include "AudioLibs/LEDOutput.h"

#define PIN_LEDS 22
#define LED_X 32
#define LED_Y 8

LEDOutput led; // output to LED matrix
int pos = 0;

void setup() {
  Serial.begin(115200);
  AudioLogger::instance().begin(Serial, AudioLogger::Info);

  // Setup LED matrix output
  auto lcfg = led.defaultConfig();
  lcfg.x = LED_X;
  lcfg.y = LED_Y;
  led.begin(lcfg);

  // add LEDs
  FastLED.addLeds<WS2812B, PIN_LEDS, GRB>(led.ledData(), led.ledCount());
}

void loop() {
   led.led(pos++) = CRGB::Red;
   FastLED.show();
   delay(500);
}
The sketch above demonstrates that the matrix uses a serpentine layout.
Testing the Wiring Logic
We can use the is_serpentine_layout parameter to select the serpentine layout.
#include "AudioTools.h"
#include "AudioLibs/LEDOutput.h"

#define PIN_LEDS 22
#define LED_X 32
#define LED_Y 8

LEDOutput led; // output to LED matrix
int x = 0;
int y = 7;

void setup() {
  Serial.begin(115200);
  AudioLogger::instance().begin(Serial, AudioLogger::Info);

  // Setup LED matrix output
  auto lcfg = led.defaultConfig();
  lcfg.x = LED_X;
  lcfg.y = LED_Y;
  lcfg.is_serpentine_layout = true
  led.begin(lcfg);

  // add LEDs
  FastLED.addLeds<WS2812B, PIN_LEDS, GRB>(led.ledData(), led.ledCount());
}

void loop() {
   led.ledXY(x++,y) = CRGB::Red;
   FastLED.show();
   delay(500);
}
The sketch above should update the leds from the top row from left to right!
The FFT Output
Finally here is the sketch that uses the AudioKit as input and displays the FFT result on the LED Matrix. If you missed my blog about FFT, I suggest that you have a look at it.
#include "AudioTools.h"
#include "AudioLibs/AudioKit.h"
#include "AudioLibs/AudioRealFFT.h" // or AudioKissFFT
#include "AudioLibs/LEDOutput.h"

#define PIN_LEDS 22
#define LED_X 32
#define LED_Y 8

AudioKitStream kit;  // Audio source
AudioRealFFT fft; // or AudioKissFFT
LEDOutput led(fft); // output to LED matrix
StreamCopy copier(fft, kit);  // copy mic to fft

void setup() {
  Serial.begin(115200);
  AudioLogger::instance().begin(Serial, AudioLogger::Info);

  // setup Audiokit as input device
  auto cfg = kit.defaultConfig(RX_MODE);
  cfg.input_device = AUDIO_HAL_ADC_INPUT_LINE2;
  kit.begin(cfg);

  // Setup FFT output
  auto tcfg = fft.defaultConfig();
  tcfg.length = 1024;
  tcfg.copyFrom(cfg);
  fft.begin(tcfg);

  // Setup LED matrix output
  auto lcfg = led.defaultConfig();
  lcfg.x = LED_X;
  lcfg.y = LED_Y;
  lcfg.is_serpentine_layout = true
  lcfg.fft_group_bin = 3;
  lcfg.fft_start_bin = 0;
  lcfg.fft_max_magnitude = 40000;
  led.begin(lcfg);

  // add LEDs
  FastLED.addLeds<WS2812B, PIN_LEDS, GRB>(led.ledData(), led.ledCount());
}

void loop() {
  // update FFT
  copier.copy();
  // update LEDs
  led.update();
}
We use a fft length of 1024 which gives 512 frequency buckets. We support plenty of led configuration parameters: When we output the data we put the buckets into groups of 3. The max magnitude parameter will drive how sensitive the display of the bars will be.
You can define your own callback functions to define your custom update logic or for determining the colours.
Here are the examples that can be found on Github:
Please note that this API has changed: so use the updated example which uses the FFTDispay class from the Github link!


0 Comments